First of all, you will need to install Script-Fu layer effects if you haven't already. The first half of this video explains how to do this.
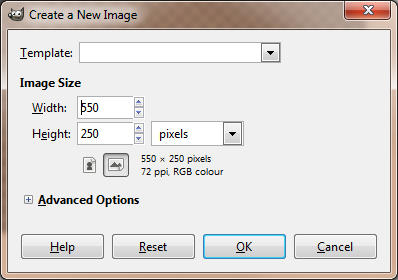
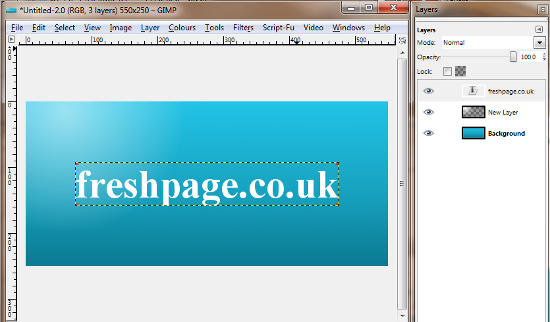
Once you've installed Script-Fu layer effects you're ready to start. Create a new project with width 550px and height 250px
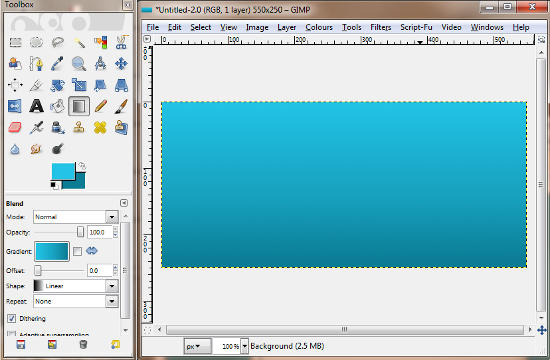
Set the foreground colour to light blue, and the background colour to a darker blue. I used 22c3e6 for the foreground and 0c7c94 for the background. Choose the blend tool with a FG to BG gradient. Create the background gradient by clicking at the top of the image and dragging to the bottom.
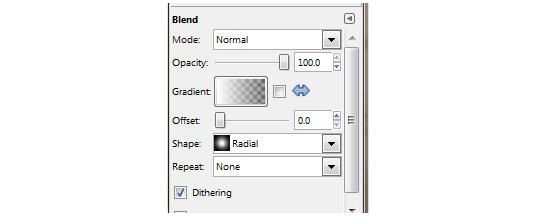
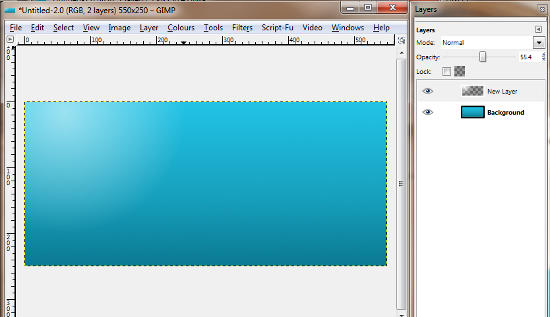
Now we need to create the light source, so create a new layer for this by right clicking on the current layer and selecting "new layer". (If the layers dialog isn't open, you can open it via windows->dockable dialogues->Layers). Set the layer fill type to 'transparency'.
Select a foreground colour of white. Change the gradient to FG to transparent and the shape to "radial".
Create a light source on the top left of the new layer. Adjust the layer transparency to something that looks fairly subtle. I've set mine to 55%
Select the text tool and choose a thick font. I'm using Times New Roman, Bold with a font size of 60px. The colour of the font doesn't matter as we're going to overwrite it in a bit. Type your text and arrange it in the center using the alignment tool.
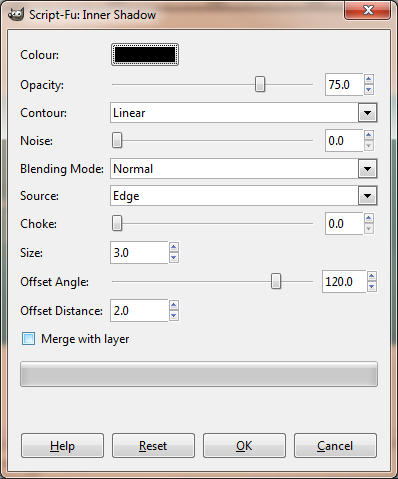
Now it's time to create the inset text effect. Make sure for each of the next steps that the text layer is selected when applying the filter. First, create the shadow inside the text on the edge facing the light source. Select Script-Fu->layer effects->inner shadow. Set the following settings and apply:
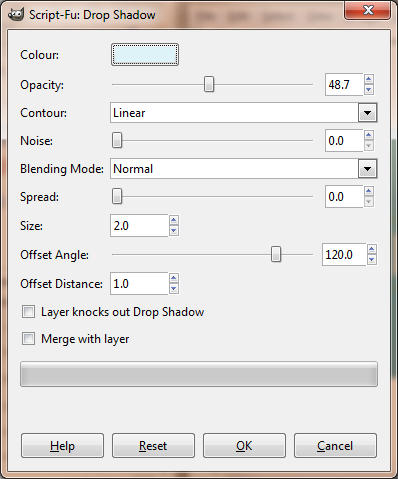
Next, we'll create a slight highlight effect on the far side of the text select the text layer again and select Script-Fu->layer effects->drop shadow. Choose a very light blue colour. I used caf0f8 with these settings:
Finally, we need to add some dark colour to the text itself to make it look like it is below the surrounding colour. Right click on the text layer in the layer dialog and click "alpha to selection". Next, create a new layer which we'll use to add the text colour to, rather than overwriting the text layer.
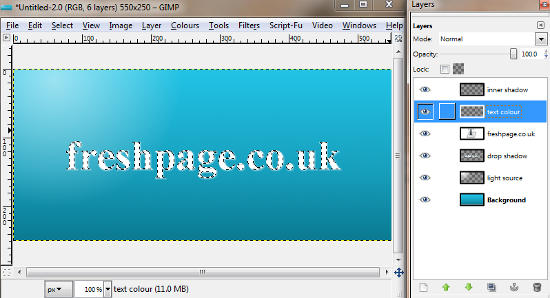
Change the foreground color to a dark blue(I used 0a6a7e) and the background colour to an even darker blue (I used less 063e4a). Click on the blend tool, and change the shape to Linear and the gradient to FG to BG. Add a gradient to the text by clicking at the top of the text and dragging the mouse to the bottom of the text. Note if you hold down control while doing this it will ensure the gradient will be applied along an exactly vertical axis.
Clear the selection (select->none) to see the finished image